January 31, 2011

Candied Orange Peel

Any fresh fruit juice is welcome at home. Now a days, I make some fresh juice or milkshake every day for breakfast. On one such day, I made orange juice and I did not feel like throwing the fresh and bright orange peels. I remember my mom saying about a vethakuzhambu using these peels. But I wanted to try some candied peels. On searching the internet, I landed here and used her recipe. Do drop in her page to see some step by step pictures and for more candy recipes in her blog. Though it involves quite some time, its worth and tastes and smells much better than the store bought one.


You need

  •  Peel from 3 oranges
  • Sugar - 1 cup
Method
Scrap the whit pith in the inner part of the peel using a spoon. I tried taking it out using a knife and I was tearing the peel in the process. I found the spoon works out better. Cut the peel into strips. Blanch the orange peel in hot water with 1/2 teaspoon of  salt added to it for 10 minutes. Drain and blanch again in  water without adding salt. Its blanched twice to remove the bitterness from the peel.

Heat water and sugar together. When the syrup starts  boiling, add the blanched strips. Continue to cook on low flame, till the strips turn translucent. Its better you  don't stir it very often,which lead to sugar crystallising.  It took 20 minutes for me. Drain the peels and spread it on a plate to dry.

The left  over orange flavored syrup can be used while making juices  orr in fruit salad. You don't have much syrup left out and it gets used up faster too.


January 25, 2011

Vegetable Pulao - One Pot Meal


One pot meals make a quick and filling lunch or dinner. Since its winter here, its mostly phulkas for dinner. Once in a while, I make this pulao for dinner. Pulao when served hot with a side of pickle and chips is always welcome. A medley of vegetables and spices with rice cooked in a pressure cooker makes a quick meal too.  I don't stick to this recipe every time I make pulao. But this is the basic recipe and I make changes according to my mood like adding some coconut milk or tomato puree etc. The vegetables that go in also add up to the taste of the pulao. The aroma when the cooker is opened, is enticing enough to bring your family to the table.


You need
  • Long grain rice/Basmati rice - 1 cup
  • Chopped Vegetables - 1 cup (carrot,french beans, potato, peas)
  • Red chilli powder - 1/4 tspn
  • Salt - 1/2 tspn

 To ground to paste

  •  Green chilly - 2 nos
  • Ginger - 1" piece
  • Coriander powder - 1 tspn
  • Garlic - 2 pods
  • Onion - 1

For Seasoning
  • Ghee/butter - 1 tblspn
  • Cumin seeds - 1/2 tspn
  • Fennel seeds - 1/2 tspn
  • Cloves - 4 nos
  • Cinnamon -1" stick 2nos
  • Bay leaf - 1 no
  • Cardamom powder - 1/2 tspn


Method

Wash and soak rice in 2 cups of water for half an hour. Make a paste of the ingredients under to made to paste. Don't add water. Moisture from the onion is enough to make the paste.

Heat a pressure cooker. Add ghee or butter. When hot, add the seasoning ingredients. When the seeds turn light brown, add the ground paste. Saute till the raw smell goes. Tip in the chopped veggies and saute for 2 to 3 minutes. Drain the water from rice and reserve the water. Add rice and continue to saute. Add chilli powder and salt and the reserved water. Stir well. Close the pressure cooker and cook for two whistles and cook in the lowest flame for 5 minutes or till another whistle blows. When the pressure is fully released, gently fluff with a fork. Check salt and add if needed.  Serve with some chips or raitha.


To make it more rich,you can add  julienned  and sauteed onions till brown, roasted cashews and raisins too.


January 21, 2011

Easy Strawberry Jam


I love making jams and I wanted to make best use of the strawberries which are in season. I usually puree the fruit and go about with my jam making. I found a recipe here and the method interested me. I followed her first step where in the berries are mixed with sugar and left for few hours. I felt this gave a good texture to the jam. As usual, I made it in microwave. So that doesn't stop those who doesn't have a MW oven. This can be very well be made on the stove top and I think it will get done in almost the same time. This jam is quite easy that you have just mix all the ingredients and cook for around 15 minutes.


You need
  • Strawberry,hulled and halved - 2 cups
  • Sugar - 3/4 cup
  • Lemon juice - from half of a lemon


Method

  
Take the strawberries and sugar in a bowl. Keep it aside for 4 hours or so. Lightly mash the berries in between. The sugar would have drawn the juice out of the berries and you can find the berries slightly pulpy too. Transfer the mix to a microwave safe bowl. Add juice from half of a lemon and micro high for 12 minutes. Give a stir at 5 minutes interval. Give a standing time of 3 minutes and do the plate test to see if the jam is set. Ladle into sterilized jars. 


Adjust the sugar according to the sweetness of the berries. Adding too much of sugar will make the jam sticky and the flavor of berries will not come through.  Enjoy on a warm toast for breakfast or tea. Try making it yourself and see how it easy it can be. Once you taste home made jam, I am sure you will never go for store bought ones.  I usually make in small batches and it gets over in 10 days. If you are making a big batch, you can as well refrigerate for longer shelf life.


On a different note: I am happy that my blog is shortlisted among the 10 best food blogs selected by Blogjunta. Kindly vote for me if you feel it deserves. The poll widget can be found the right side bar of the blog. Let the best blog win. Thank you dear readers for your support. Thanks to the friends who have already voted.


January 19, 2011

Guava Cheese

There is no chesse in this guava cheese.  I have read about guava cheese in some novels. At that time I did not have any idea about what it is. Later, through blogging, I understood its a kind of fudge like sweet made out of guava. I am so fond of guavas. I love to eat to bite into the fruit and I don't prefer to slice them and eat. During my college days, we used to be given fruits daily. Guavas was also given. In my last year, one of classmate, Sandhya shifted to a room near to mine. Knowing my love for this fruit, whenever it is given, she used to invariably come and check if hers is bigger than mine and will exchange it. Even today, whenever I eat guava, those memories keep coming back.

Coming to the recipe, it doesn't call for many ingredients. The main ingredients are guava and sugar. But it is very time consuming. I adapted the recipe from here. Hop there to see the step-by step pictures. I decided to do it microwave thinking it will get done quickly with minimum effort. After around 25 minutes, it did not look like thickening any sooner. So I completed it over stove top. I did not get the red color as in the original recipe. So decided to add some color else it was a pale yellow.


You need

Guava pulp - 1 cup heaped ( Used 3 guavas)
Sugar - 3/4 cup
Lemon juice - 1 tspn
Butter - 2 tspn
Food color (optional) - 3 drops of red+ 1 drop of blue

Method

Preparing the pulp

I used 3 big ripe guavas. Make slit on four sides of the guava. Don't make the slit very deep. Pressure cook the three guavas with a cup of water.  When the guavas cool, cut open them. Scoop the seeds along with some pulp. Keep the seeds separately. Take the pulp into a separate bowl. Strain the seeds along with the cooked water to extract the pulp sticking to the seeds. Use a sieve or a cheese cloth for this. Take all the pulp in a mixer jar and puree it. Add sugar also and blend well.

Take the pureed pulp in a heavy bottomed vessel and cook on a low flame. Half way through the cooking, add lime juice. It helps in setting the cheese faster. When it starts thickening, add butter. Adding butter gives a sheen to the cheese. When the mix comes together and leaves the sides of the vessel, transfer to a greased plate. Spread even. When it is warm, mark slices.

I cooked for around half an hour in the MW. But since it wasn't setting, I thought it is better to cook on stove top so that I know when to stop. I cooked for another 10 minutes on the stove and it was set. If you take a spoon of the mix and it is rollable with your finger, then you can stop. The cheese should be soft, yet firm.


January 18, 2011

Uzhundu Vadai/Medhu Vadai

This is in continuation with the last post of Pongal nivedyam. As I told, for a change, this year I made Uzhundu (Urad dal) Vadai. Unlike the paruppu vadai, this is a bit tricky. You need to get the batter consistency right to get crisp , yet soft vadais. The dal should be soaked well and grind to a smooth, thick batter. While grinding the dal, you should not be tempted to add water liberally. Add just enough water to get the blades of the mixer grinder move. Next hurdle is to get the shape right. You can use a oiled plastic sheet or banana leaf to pat the vadai. I am comfortable shaping on my hand. So the vadais are not big in shape. I find making it on a sheet/leaf is more cumbersome and I don't get the shape also well. So I do it on my hands which makes the process fast.


You need

  • Whole urad, skinned - 1 cup
  • Green chilli - 3 nos
  • Peppercorn - 1/2 tspn, crushed
  • Curry leaves, chopped - 1 tspn
  • Salt to taste
  • Oil to deep fry
Method

Wash and soak the urad dal in enough water for 2 hours or so. The dal should be soaked well. Grind it in mixer grinder or wet grinder to a smooth batter, adding minimal water. Add the rest of ingredients to the batter and mix well.

Heat oil in  a kadai. When the oil is hot, shape the batter into round discs with  hole in the centre. Gently slide it into hot oil. Fry till it is golden brown.

While shaping vada, moist your fingers by dipping in a bowl of water. Then take the batter in your hands. This will ensure the batter not to stick on your palm while shaping and sliding it into oil. Take care you don't add water to the batter in the process

Variations: Chopped onions or grated carrot or finely chopped keerai/spinach can be added.


January 15, 2011

Pongal Special ~ Ven Pongal & Chakkarai Pongal

Wishing all my readers a very happy Pongal/Sankaranthi. Like every year, I made Ven Pongal, Chakkara Pongal and Vadai to celebrate the occasion. For a change, Husband wanted Uzhundu (urad dal) vadai  instead of the paruppu vadai, which is usually made for Pongal. I could not get fresh turmeric so tied the dried ones to the pot.


Chakkarapongal

You need
  •  Raw Rice/Pachharisi - 1/2 cup
  • Moong dal - 1/4 cup
  • Jaggery - 1 cup
  • Boiled Milk - 1/2 cup
  • Ghee - 2 tspn
  • Cashew - 10 nos
  • Raisins - 10 nos
  • Cardamom powder - 1/2 tspn


Method
Roast rice and dal separately. Pressure cook with 2 1/2 cups of water. Melt jaggery with 1/4 cup water. Filter to remove any impurities. Bring jaggery syrup to boil and stir in the cooked rice and dal. Cook on low flame till the jaggery is well absorbed by the rice,dal mix. This will not take much time and will get done quickly. Do keep stirring to avoid the mix getting stuck to the bottom. The color of the rice and dal will change to brown on cooking. Finally stir in the milk and cook for a minute or two for it blend well and remove from fire. Don't cook for longer time once the milk is added to avoid curdling.


Roast cashew nut and raisins in ghee and add it to the pongal. Finally add cardamom powder.


VenPongal

You need

 
  • Rice - 2/3 cup
  • Moong dal - 1/3 cup
  • Turmeric - a small pinch
  • Hing -1/4 tspn
  • Water - 3 cup
  • Ghee - 2 tblspn
  • Cumin seeds - 1 tspn
  • Peppercorns - 5-8 nos, crushed
  • Few curry leaves
  • Cashew nuts - 10 nos (optional)

Method

 
Dry roast rice for less than 5 minutes or so. Roast moong dal till you can smell the aroma of roasted dal and the dal would have turned light brown. Wash rice and dal together. Add 3 cups of water to rice+dal  mix. Add a pinch of turmeric and hing to it. Pressure cook till it is soft. After pressure cooking, the rice and dal would have cooked soft with no traces of water in it.


Mash it lightly with the ladle.


Heat a pan and add ghee. When ghee is hot, add cashews, cumin ,crushed pepper and curry leaves. When cashews start browning remove and add the seasoning to the rice dal mixture.


Mix well and serve hot. Coconut chutney goes well with pongal.


I shall post the vadai recipe in the next one. Until my friend, who is a follower of this blog, messaged me that she was expecting a post on pongal recipes, I didn't realize that I haven't posted the recipes here. Thanks Anu, this is specially for you.


Wishing all my readers a lovely day of celebrations with friends and family.

January 13, 2011

No Bake Strawberry Cheesecake

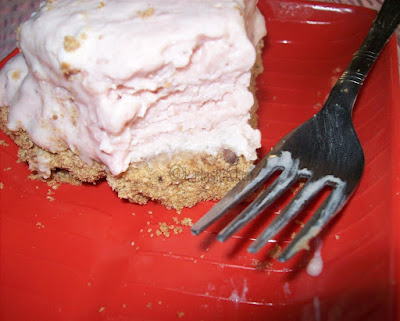
Though I wanted to clear my drafts at the earliest, I do not want to postpone the posting of recipes which makes use of the seasonal fruits/vegetables. Strawberries are in plenty in the market and its hard to ignore those red beauties.  When  Mahabaleshwar is nearby, you can find them in heaps at the carts lined up near the market. I wanted to make best use of them during the season. My husband is happy with the milkshake. He says why bother to use them in any other way when the milkshake is heavenly. While looking for strawberry recipes, I came across the cheese cake recipe at Nandita's. And I decided it was the dessert for the New Year's eve.  I did not make much changes to her recipe except that I used some chocolate biscuit too and increased the sugar by 1/4 cup.


For the base

 
  • Marie biscuit - 1 packets (24 nos)
  • Chocolate biscuit - 1 pkt (I used Hide & Seek)
  • Melted butter - 3 tblspn


For the cake

 
  • Fresh Strawberries - 250 gm
  • Sugar - 3/4 cup
  • Hung curd - 1 cup
  • Fresh cream - 1 cup (used Amul cream 200ml)
  • Agar agar/China grass - 1 pkt (10 gm)
  • Water - 4 tblspn

Method

 
I used a combination of marie biscuit and chocolate biscuits. You could use marie biscuit alone. Pulse the biscuit coarsely in the mixer along with the melted butter. Or take the biscuits in a zip lock cover and powder it coarsely with the chappathi roller.


Take a round tin. Line it with cling film. Make sure you leave some of the film hanging over the edge, to make it easier to lift the cake out of the tin, later. Spread the biscuit mix on the tin. The base should be firm. So press it down tight. Freeze the base for half an hour. Meanwhile prepare the cake mix.


Mix hung curd and cream in a bowl. To get hung curd, take almost 4 cups of fresh curd and tie it in a muslin cloth and hang it. The whey will be drained and you will be left with creamy curd.


Puree strawberry with sugar till smooth.


 Mix in the strawberry puree to the curd+cream mix. Mix well so that its uniformly blended in.


The agar agar I used were strands. I put them in warm water for 10 minutes. Then put that bowl in a pan of boiling water for the china grass to fully dissolve. Add the liquefied agar agar to the mix. Mix it well with a spatula. I reserved few drops of the puree and made a marble effect. But on setting, the effect was not seen, though. Leave in the refrigerator for overnight, to set.


Once set, take the pan and pull the cake out by lifting the cling film. You could garnish with some fresh strawberries or strawberry preserve. I served it plain


Notes:

 
The quantity of agar agar used  helps in the setting of the cake. I used only half a packet (5 gms) which I found was not enough. On leaving it in the fridge overnight also, the cake did not set well. Later I had to move it to the freezer to set. Then it set well. But once taken out, after sometime, it started melting like an ice cream. The full packet of agar agar would have worked well. But for that, the cake tasted well. No after taste of agar agar.


January 10, 2011

Sweet Potato Methi Tikki

With the New Year, I had decided my drafts folder will get the priority. There are some pics which dates back to more than a year. Hope they get to the post at the earliest. So I decided that my first post for the year will be from the drafts. And here it is.

At home, sweet potato is mostly relished when it is just cooked with some salt and turmeric. Occasionally, amma used to make a stir fry with a dash of coconut and green chilli. One day, I had some  left over cooked sweet potatoes. So I decided to make it into a tikki for the evening snack. While looking in the crisper tray of my fridge, methi leaves in the zip lock caught my attention. The idea of pairing sweet and bitter taste was interesting and decided to go ahead. I have consciously avoided adding onions to it since I felt onions might mask the flavor of methi and sweet potatoes.


You need

  • Cooked and mashed sweet potato/Chakkaravalli kizhangu- 2 cups
  • Chopped methi leaves - 1 cup, loosely packed
  • Cumin - 1 tspn
  • Salt to taste
  • Turmeric - 1/4 tspn
  • Red chilli powder - 1/2 tspn
  • Kitchen king masala- 1/2 tspn
  • Sugar - 1/2 tspn
  • Juice from half of a lemon
  • Oil - 1 tblspn + for shallow frying
 
Method

 
Pressure cook sweet potatoes with turmeric and salt. Cool and mash it well.  Heat a kadai with a tablespoon of oil. Add cumin. When it starts browning, add methi, salt, sugar and a pinch of turmeric.  Saute till there is no moisture left and tip in the mashed potatoes. Add red chilly powder and kitchen king masala. Cook till the mixture turns dry. Remove from fire. Let it cool for sometime. Add lemon juice and mix well.  Shape into tikkis and shallow fry on tawa till brown.

 
Serve with tomato sauce and a cup of hot mug of coffee/tea.