Showing posts with label Dessert. Show all posts

April 14, 2011

Coffee Ice Cream ~ Summer Special


Its going to be three weeks since I posted a recipe here. The break was not intentional. Two back to back trips and some deadlines to be met at work, I did not get the time or the inclination to blog. And I could not visit any of the blogs too.  After a break, I have the starting trouble to get it started.  For the last two days, I have been trying to post a recipe and finally I am at it. I decided to post an ice cream which is apt for the summer. I referred the recipe at Tarla Dalal's.  I followed ingredients mentioned in the recipe  but went with my intuition regarding the quantity. You don't need an ice cream maker for this and yet get a soft, creamy ice cream.


You need

  • Milk - 1 cup
  • Fresh cream - 1/2 cup (I used Amul)
  • Cornflour - 1/2 tblspn
  • Sugar - 1 tblspn
  • Instant coffee granules - 2 tspn
  • Hot water - 1 tblspn

Method

Take milk in a bowl. Stir in the corn flour and mix so that no lumps are found. Heat the mix and bring it to a boil. Add sugar. Keep stirring so that no lumps are formed and it doesn't stick to the bottom. When the milk turns slightly thick, remove from fire and leave it to cool. 

Add fresh cream, coffee solution and vanilla essence to the milk mix. Whisk to blend. Freeze in a shallow steel container. After two hours, when it is almost set, whisk to break the crystals. Use a wire whisk or a hand blender. Freeze again and repeat the whisking once more when it is set. Then freeze it for 4 hours to set it completely.

Remember to increase the cooling temp of your fridge. Also chill the container before adding the ice cream mix for faster freezing. Adding chilled cream also helps.

Scoop and enjoy the ice cream. The quantity was enough to serve 3. The coffee flavor was very strong. Adjust the amount of coffee granules according to your taste. When my cousin tasted the ice cream, he was surprised to taste coffee flavor and asked me which brand sells this flavor. Should I say anything more about the taste and texture of the  ice cream.


March 12, 2011

Carrot Kheer/Payasam

Red, juicy carrots are in season and these varieties are prefect for Gajar ka halwa. And the weather is best for warm desserts. Another warm dessert is the delicious kheer. Its very easy to make and no grating involved as in halwa. It gets done with minimal effort. Here is how I make it.


You need
  • Carrot - 4, long ones
  • Milk - 500 ml
  • Sugar- 1/2 cup
  • Ghee - 1 tspn
  • Raisins,Cashews - 1 tblspn
  • Cardamon powder -1/4 tspn

 
Method
 
Wash and peel the carrots. Cut into half inch thick roundels. Cook the carrots with 1/4 cup of milk in the pressure cooker. Leave the cooked carrots to cool. Puree the carrots not so very fine. Boil the milk and stir in the carrot puree. Cook till the milk+carrot mixture thickens. Add sugar and it will thin the kheer. Boil till it starts thickening. Add roasted cashews, raisins and cardamom powder. Remove from fire. Serve warm or chilled as you wish.

 
P.S - Grinding some cashewnuts along with carrots will give a more rich and creamier kheer.


March 9, 2011

Strawberry in two avatars - Milkshake and Shrikand

I am putting the strawberry season to full use. And this is the first time I have access to strawberries which doesn't cost a bomb. And we are nearing the end of the strawberry season here. I have frozen quite a few and made two bottles of jam. The easiest way to use them is to make milkshake for breakfast. Its made atleast twice in a week during the season. Occassionaly, I make strawberry flavored Shrikand too. That is also quite easy except that hung curd has to be made. Often I forget to reserve the curd to prepare hung curd and by the time I realise I would have churned the curd to make buttermilk. At home, we prefer buttermilk than curd. Though the plain Shrikand is not much favored by husband, he loves the strawberry flavored one. So here is two super easy recipes with strawberry. In fact, there isn't much to write about  in terms of the recipe. Here is I how I make it.

Strawberry Milkshake


You need
  • Strawberries - 10 -12 nos
  • Chilled milk - 2 cups
  • Sugar - 2 tblspn (Or use honey)

 Method
Wash and hull the strawberries. Cut into halves. Blend the halved strawberries along with sugar to fine puree. Add the chilled milk and pulse for few second. Pour into glasses and chill it if you are not serving immediately.


Strawberry Shrikhand


You need
  • Hung curd - 1 cup
  • Strawberries - 8 to 10 nos
  • Sugar - 2 tblspn
  • Cardamom powder - 1/2 tspn
Method
To get hund curd, take 4 cups of curd in a cheese cloth. Tie it and hang it to drain the whey or the liquid in the curd. What remains is the creamy curd. I usually hang it in inside the fridge so that the curd doesn't turn sour.

Puree the strawberries with sugar. Beat the curd till smooth. Add the sweetened strawberry puree. Mix well. Finally add cardamom powder. Chill and serve. Garnish with chopped pistachios/almonds/chiroli  while serving


January 13, 2011

No Bake Strawberry Cheesecake

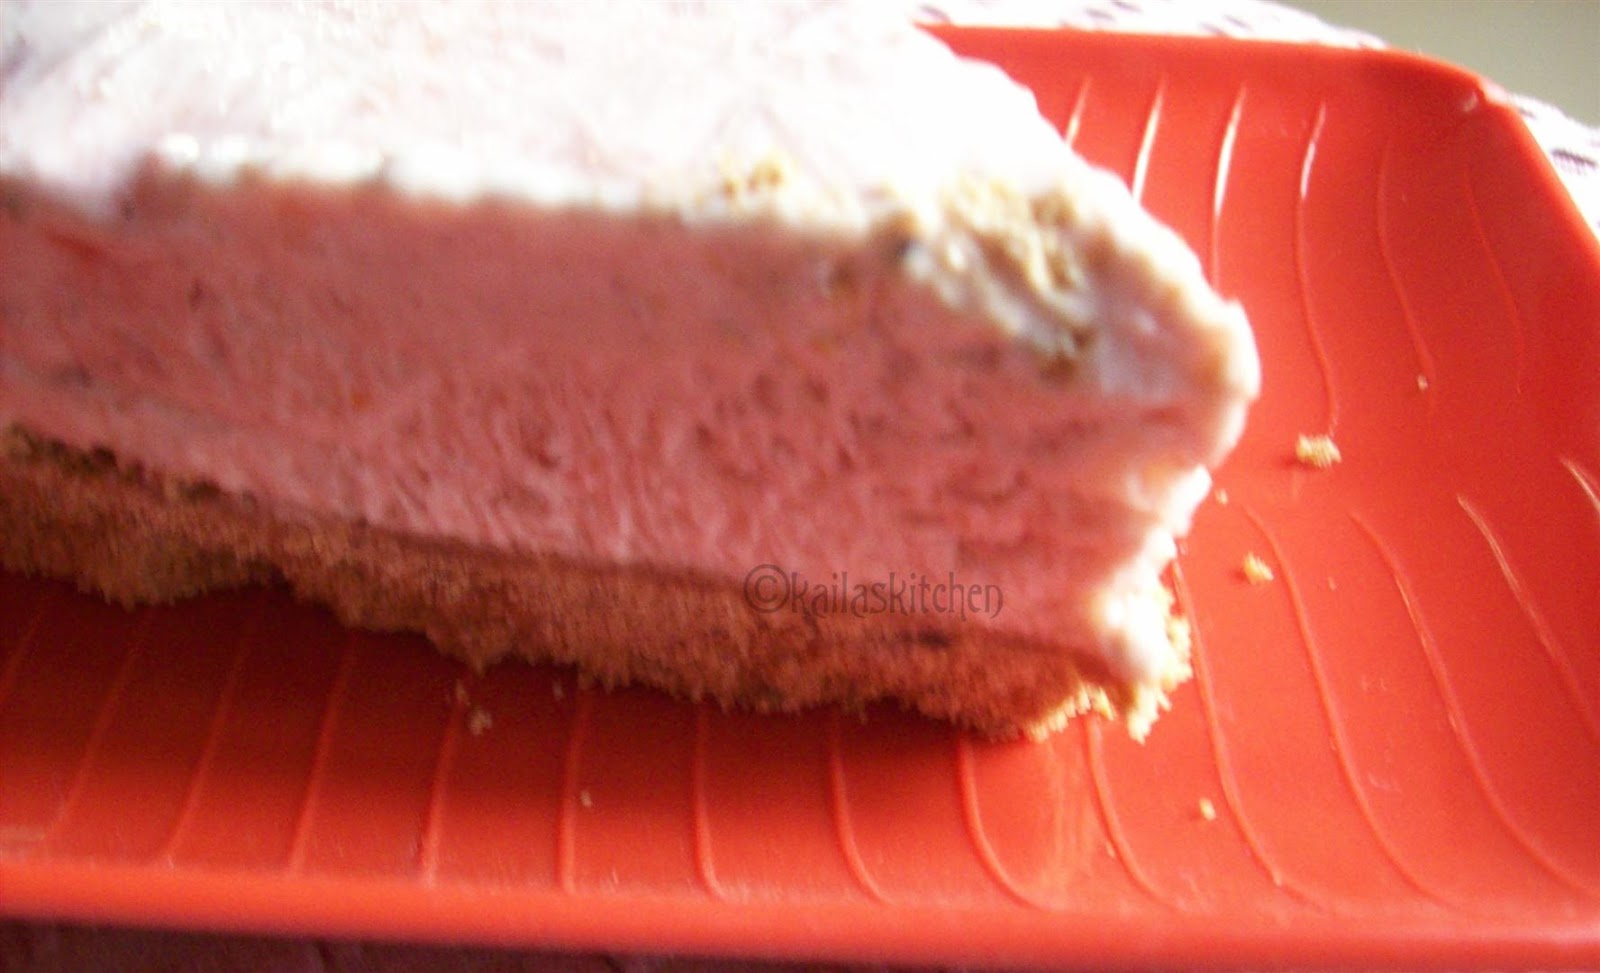
Though I wanted to clear my drafts at the earliest, I do not want to postpone the posting of recipes which makes use of the seasonal fruits/vegetables. Strawberries are in plenty in the market and its hard to ignore those red beauties.  When  Mahabaleshwar is nearby, you can find them in heaps at the carts lined up near the market. I wanted to make best use of them during the season. My husband is happy with the milkshake. He says why bother to use them in any other way when the milkshake is heavenly. While looking for strawberry recipes, I came across the cheese cake recipe at Nandita's. And I decided it was the dessert for the New Year's eve.  I did not make much changes to her recipe except that I used some chocolate biscuit too and increased the sugar by 1/4 cup.


For the base

 
  • Marie biscuit - 1 packets (24 nos)
  • Chocolate biscuit - 1 pkt (I used Hide & Seek)
  • Melted butter - 3 tblspn


For the cake

 
  • Fresh Strawberries - 250 gm
  • Sugar - 3/4 cup
  • Hung curd - 1 cup
  • Fresh cream - 1 cup (used Amul cream 200ml)
  • Agar agar/China grass - 1 pkt (10 gm)
  • Water - 4 tblspn

Method

 
I used a combination of marie biscuit and chocolate biscuits. You could use marie biscuit alone. Pulse the biscuit coarsely in the mixer along with the melted butter. Or take the biscuits in a zip lock cover and powder it coarsely with the chappathi roller.


Take a round tin. Line it with cling film. Make sure you leave some of the film hanging over the edge, to make it easier to lift the cake out of the tin, later. Spread the biscuit mix on the tin. The base should be firm. So press it down tight. Freeze the base for half an hour. Meanwhile prepare the cake mix.


Mix hung curd and cream in a bowl. To get hung curd, take almost 4 cups of fresh curd and tie it in a muslin cloth and hang it. The whey will be drained and you will be left with creamy curd.


Puree strawberry with sugar till smooth.


 Mix in the strawberry puree to the curd+cream mix. Mix well so that its uniformly blended in.


The agar agar I used were strands. I put them in warm water for 10 minutes. Then put that bowl in a pan of boiling water for the china grass to fully dissolve. Add the liquefied agar agar to the mix. Mix it well with a spatula. I reserved few drops of the puree and made a marble effect. But on setting, the effect was not seen, though. Leave in the refrigerator for overnight, to set.


Once set, take the pan and pull the cake out by lifting the cling film. You could garnish with some fresh strawberries or strawberry preserve. I served it plain


Notes:

 
The quantity of agar agar used  helps in the setting of the cake. I used only half a packet (5 gms) which I found was not enough. On leaving it in the fridge overnight also, the cake did not set well. Later I had to move it to the freezer to set. Then it set well. But once taken out, after sometime, it started melting like an ice cream. The full packet of agar agar would have worked well. But for that, the cake tasted well. No after taste of agar agar.


July 27, 2010

Chakka Pradhaman- Jackfruit & Jaggery cooked in coconut milk

I wrote in my last post, that I used up the chakka varatti. Yes, I prepared chakka pradhaman as neivedyam for the first friday of Aadi/Karkidakam. I usually make only neipayasam on all fridays. This time I made an exception. If you have chakkavaratti and coconut milk in hand, then making this pradhaman is a breeze. In Kerala, payasam is referred to as pradhaman when coconut milk is used. Now you might think, then how come palada pradhaman where milk is the ingredient. In earlier days, Ada pradhaman was made with jaggery and coconut milk. May be later on, with the availability of milk in abundance, some chef might have come up with this version.

As in all pradhamans, you need 3 sets of coconut milk- thick, medium thick and thin. The first extract from the coconut is the thick milk and subsequent extracts are the medium thick and thin, which are called as first, second and third milk in the order of extract. Coconuts used are not very matured ones. While selecting coconut for milk extraction, look for the coconuts which doesn't have dark brown shell. The ones which has shades of cream are good. Sorry, I forgot to click pics of the coconut. It would give a better idea.

For 1 cup of chakka varatti, you will need about 2 medium sized coconuts. Take the amount of chakka varatti and coconut milk given here as an indication. You go by your instinct and it cannot go wrong. Little less or more of any quantity may not effectthe end result in a big way. So here comes the recipe


You need

  •  Chakka varatti - 1 cup, packed
  • Three sets of milk extracted from 2 coconuts.
  • Chukku podi/Dry ginger powder - 1 tspn

  
Method

 
Grate the coconut. Pulse the grated coconut with very little water. Add water just enough to ease the grinding. Squeeze the milk out with the help of a muslin cloth lined on a strainer. For the successive extract, you can add around half cup of water. Keep each set of milk separately.

  
1) Take a thick bottomed vessel or kadai. Dilute the chakka varatti in a cup of hot/warm water.


2) Then add the third milk. Bring to boil. Simmer for 10 minutes.


3) Add the second milk and simmer in medium low heat till it thickens. You can smel the flavor of jackfruit and jaggery as it thickens.


Once you add the first milk, no more cooking is done. So it will dilute the payasam. keep that in mind and let it thicken well. Finally add the first milk and remove from heat. Don't leave it on heat once you add the first milk, since there are chances of curdling. Add a teaspoon of dry ginger powder. Serve hot or cold.


You can add cardamom in place of chukku podi. Chukku/dry ginger will aid in digestion and probably thats the reason why it is added.


November 19, 2009

Carrot Halwa ~ A popular winter dessert

My appa is here with us for a short stay, from Gurgaon. Among the list of items to be sent through Appa, I asked Amma to send some carrots too. Yes the red, juicy Delhi carrots. Those variety is hard to get in my place. You guessed it right, I wanted to make carrot halwa. Its long time since I tasted halwa made with the red carrots. I made a batch on the same day Appa arrived.

Appa likes to chop veggies and during his stay, I am relieved of that job. I am not the kind of person who is ready to entrust the veggie chopping to anybody who offers to do the same. But Appa insists on doing it. And needless to say he grated the carrots. Half the job is done. I proceeded with the cooking. I made in two batches on different days. On the first day, I cooked the carrot in MW and rest of the process on stove top. The next day, I made it entirely in the microwave oven. I did not find MW making the job easier. The time taken was almost the same. May be a gain of 10 minutes or so in the MW. But opening the MW door, carefully taking the glass bowl and giving a stir at regular intervals, made me feel stove top is the better method. I shall give how I did bothways.


Ingredients

Grated carrot - 3 cups

Milk - 1 cup

Sugar - 1 cup

Ghee 3 tblspn

Cardamom powder - 1 tspn

Cashew/raisins - 10 each


Method

Grate the carrot using the large eyed grater. This will ensure the carrots don't get cooked mushy. And you will be able to bite into the pieces while you eat. But if you prefer a softer kind of halwa, grate it fine.

Cook grated carrot and milk in pressure cooker for one whistle. Or it can be cooked on stove top, till the carrot is fork tender and the milk is almost dried up. I cooked it in MW for 8 mimutes. In the kadai, heat a tablespoon of ghee and fry the cashews and raisins. Transfer the cooked carrot along with milk to a thick bottomed vessel of kadai. Stir in sugar and continue cooking for low flame. Keep giving a stir now and then. When the milk and sugar is fully absorbed by the carrots, add ghee and powdered cardamom. The mixture should not turn too dry but should be moist. Finally garnish with fried cashews and raisins.

Serve warm, ideally with a scoop of vanilla icecream.


Microwave method

Cook carrot and milk for 8 minutes. Stir in sugar and cook for 20 minutes. Give a stir at 5 minute intervals. Add ghee and cardamom and cook for 6 minutes. Garnish with fried cashews and raisins. I have used carrot, milk and sugar in the ratio 3:1:1. If you want it to be sweeter, you can increase the sugar by 1/4 cup.


October 14, 2009

No bake chocolate pinwheel

Everyone must be busy planning for the festival weekend. And most of you must have already started with the preparations of sweets and savories. Here is a quick, no cook, recipe to delight your kids. I made this when my niece was here for her summer holidays. As always, I clicked few pictures and forgot about it. When Srivalli announced the Kid's Delight event, I wanted to send this. I got the recipe from a TV show, where in they were showing some quick recipes which can be made by kids themselves.


You need

Marie biscuit - 1 pkt

Cocoa Powder - 2tblspn

Powdered sugar - 5 tblspn

Butter - 2 tblspn

Milk - 4 tblspn


Method


Powder the marie biscuits in the mixer grinder. Seive it to get fine powder. Else it will make rolling the dough difficult.  Mix in cocoa powder and 2 tblspn of sugar. Prepare a tight dough using milk. 


You can mix some coffe powder in the milk if you love the flavor of coffee in your cookies. Coffee and chocolate complement each other well.

For the filling

Beat butter and sugar until creamy. You can optinaly add some dessicated coconut or coarsely chopped nuts also.


Roll dough into a thick chappathi. Spread the filling evenly. Leave some space at the edges. Then roll from the longer end to form a log shape. Roll it tightly and seal the crack if any, as you roll. Cover the log in a butter paper or aluminium foil and refrigerate for 2 hours. Cut along the width to get beautiful pinwheel cookies.


It will be a great hit among the kid's if it is part of the birthday parties.


August 6, 2009

Uppittu,Paruppu Vadai, Godhambu Pradhaman for Avani Avittom

Yesterday I posted the pictures only. I am posting the recipe in twp parts. The main menu will follow in the next post. Here are the recipes of the festive specials.

For avani avittom, in both our families, its customary to make parupu vadai ( Chana dal fritters), Uppittu and Pal Payasam (Milk and rice kheer). Paruppu vadai is the popular masala vadai minus the onions/garlic in it. When vadai is made as prasadam/offering, onion/garlic is not included. We don't use onions in any cooking on those days. Also if any Brahmacharis(Bachelors) are there in the house, neiyappam is also made. Sine my husband is not very fond of pal payasam (Read he will taste only a teaspoon), I decided to make some pradhaman. Since chana dal is the star ingredient in both the other dishes, I went for godhumbai(cracked wheat). I am giving the measurements that I prepared for the day.

Paruppu Vadai/Aama vadai
Yields - 20 nos

You need
Chana dal/Kadala paruppu - 1 1/4 Cup
Tuvar dal - 1/4 C
split urad dal - 1 tblspn
Red chillies - 3 nos
Green chillies - 2 nos
salt
curry leaves
Hing - few shakes
Oil to deep fry
The measurements need not be accurate. Approximate measurements will work too. This is just an indication of the proportions of the various dals used. Also adjust the green and red chillies according to the variety used. You should not feel the heat of the chillies too much while eating it.

Wash and soak the three lentils together for 1 hour along with the red chillies. Drain and leave it in the colander for few minutes so that the water is drained fully. Reserve 2 tablespoons of the lentils. Grind the lentils in the mixer to a coarse paste. You may not require water at all, since the lentils are moist enough. Stir in the reserved lentils to the ground batter. Add finely chopped chillies,curry leaves, salt and hing powder. Mix well. Don't allow the batter to sit for long. Its recommended to make the vadas immediately else it will drink lot of oil on frying.

Take a gooseberry sized batter and make into a ball. Use banana leaf or greased zip lock cover. Place the batter on it. slightly press it down using the palm. The shape will resemble that of the tortoise hence the name aama vadai.
Heat oil in a kadai. When it is hot, slowly slide the vadai into the oil. Take care not to splash the oil while sliding. You can make 4/5 in a batch depending on the frying pan and the amount of oil used. After 3 minutes or so, gently flip them so that the other side is also cooked. I follow my mom's method while frying vadas. When the vadas are half cooked, I drain them. Continue with the second batch and drain them too when its just golden in color. Then I re-fry the the first batch till it is golden brown. The two step process ensures more crispness and the inside too will be well cooked.


Uppittu
Uppittu is similar to Boli. The making process is almost the same. My mom uses moong dal for the stuffing and my MIL goes for chana dal. And I followed MIL. With some planning ahead, you can make sure, you are not left with excess of the filling/outer covering dough. I divide both the dough and filling into four parts and make equal no of balls from each so that everything gets used up and adjust the size accordingly to make up for the excess. The yield numbers may vary depending on the size you make. I got 20 nos.


For the outer cover

Wheat flour - 2 1/2 Cups

Turmeric = 1/2 tspn

Salt a pinch

Ghee/Gingely Oil - 4 tblspn

Water to make the dough.

Prepare the dough with all the ingredients mentioned above. You can add more oil/ghee to make it soft.Prepare the dough at least an hour before. The longer the dough sits, the softer the uppittus be.

For the filling

Chana dal/kadala paruppu - 3/4 cup

Powdered jaggery - 1 1/2 cups

Grated coconut - 1 1/2 cup

Ghee - 2 tblspn


Pressure cook chana dal till soft. Drain the cooked dal and grind it along with powdered jaggery and finally add grated coconut and pulse for few seconds to blend everything. Heat a kadai and a tablespoon of ghee. Tip off the ground mix into the kadai. Keep stirring till it turns dry. You can add some ghee while stirring to avoid sticking to the kadai. Leave it to cool.


I use banana leaves to make the uppittu. Moist your fingers with little ghee. Take a ball of the outer covering. Pat into a small circle and keep the filling on the centre and fold the edges to cover it. Shape into a ball again with the filling inside and again pat it with your fingers to a circle. Don't make it too thin. This is slightly thicker when compared to Boli.


Heat a tawa and place the banana leaf with the uppittu on the down side. After few seconds, you can slowly,lift the leaf apart. Cook both sides. Since we had added enough ghee/oil in the dough you may not require much ghee to cook them. Remove from the pan and fold it. This can be eaten by soaking in cardamom flavored milk, though it tastes good as it is.

Godhumai/Cracked wheat pradhaman


You can find godhumbai pradhaman recipe here. This time I used fresh coconut milk from a relatively big coconut and cracked wheat. In the earlier post, I used wheat rava.




June 26, 2009

Mango Mania from other blogs

During the last mango season, I had bookmarked few mango recipes. As with most of the bookmarked list, this also did not make its way into my kitchen. This year, I did not want to give it a miss and had decided to try them, as soon as the season began.

1. Lata's Mango cake


I followed her recipe with some changes. I used half and half of All purpose flour and wheat
flour. No nuts in the cake since I did not have any. And I used fresh mango pulp. I was making the cake for my guests. So I decided to bake in the muffin try for easier serving. The cake batter was less for two batches, so I reduced the muffin size and saved the batter for a small cake in a tube pan.
Ingredients
All purpose flour - 1 cup
Whole wheat flour - 1 cup (Aashirvad Atta)
Baking powder - 1 tspn
Baking soda - 1 tspn
Fresh mango pulp - 1 cup
Sugar - 1/2 cup
Milk powder - 1/2 cup
Yogurt - 1/2 cup
Vegetable oil - 1/2 cup
Hot water - 1/4 cup


Preheat oven to 180 C. Sift together the All purpose flour,wheat flour, baking powder, and baking soda in a bowl.Blend together mango pulp, water, sugar, milk powder, yogurt, and oil in a blender, until smooth. Mix in the blended puree into flour mixture and mix well. Transfer the mixture to a baking pan and bake for 35 minutes or until done. The cake was very moist, with a slight flavor of mango. The mango flavor is not very intense. I might try the same recipe with some other fruit puree.


2. Ice cream from Bharathy's kitchen laboratory


You need:

Mango pulp - 1 cup

Thick creamy milk - 1 cup

Arrowroot flour/maida - 1 tbspn

Sugar - 3/4 cup

Fresh cream - 1 tblpsn

Keep 4 tablespoons of milk aside to dissolve the arrowroot powder. Boil half litre of milk and simmer for few minutes so that it reduces in volume and gets thick. Stir in sugar and boil till
it is fully dissolved. Add the arrowroot mix with constant stirring to avoid lumps. The milk will get thicker now. Cool and min in the mango pulp. Blend the mix until smooth in a blender. Transfer the mix to a plastic tub and freeze. when it starts to freeze, whip again in a blender with the fresh cream added. Freeze the mixture again till it hardens.

Scoop into cups and enjoy homemade ice cream.


I am sending these to Srivalli's Mango Mela

May 19, 2009

Dates Kheer


A healthy and delicious kheer with dates. To make a sugar free dessert, you can actually do with out adding sugar too, not to forget the natural sugar in the dates. I have added sugar since I made it when I had guests at home. This is a very easy recipe. Its almost like a dates milkshake transformed into a kheer. And it sure makes a rich dessert. No soaking required if using soft dates.

Ingredients
Dates deseeded - 100 gms/20 nos
Milk - 1 litre
Sugar - 1/2 cup
Cardamom powder -1 tspn
Ghee 1 tblspn
few cashew nuts to garnish

Method
Soak the dates in a cup of hot milk (from the 1 lite) for an hour. Grind to fine paste. If you would like to bite into tiny pieces of dates, you can make a coarse paste. Boil the remaining milk. When it comes to boil, simmer for few minutes in low flame. Stir in the ground dates and simmer till it
blends well. Add sugar and continue cooking till the sugar is well dissolved and kheer thickens. Add cardamom powder and remove from fire. Roast the cashew nuts in ghee and sprinkle on the kheer. You can also roast some finely chopped dates in ghee and add as garnish in addition to nuts. Serve warm or chilled.


I am sending the bowl of kheer to Srivalli's Mithai Mela.